Repurposing preloved fabric: How to make a jewellery pouch
Start to Stitch founder Annie Lucas shows how to give a new lease of life to preloved fabric or garments.

Here at Seasalt, we believe the clothes we love the most should be worn, repaired and reused. But when your favourite pieces have seen better days, it doesn’t mean you have to throw them away. Why not give them a new lease of life by turning them into something new?
We catch up with Start to Stitch founder, Annie, who shares her tutorial for crafting a beautiful jewellery pouch, called a Ker Pouch, from any spare clothing or fabric offcuts. Ker is the old Cornish word for ‘precious’ – so it is the perfect name for a place to safely stow your jewellery and other special pieces.
For this tutorial Annie has used fabric from preloved Seasalt garments.
Dimensions
- Flat: 35cm across
- Closed: 15.5cm x 8cm
- These measurements will vary according to how full of treasures your pouch is
You will need
- Outer Fabric: 1 x 40cm x 40 cm piece of fabric
- Lining: 1 x 40cm x 40cm fabric piece, and 2 x 30cm x 30cm fabric pieces
- 2m ribbon or cord up to 1cm wide
- 40cm x 40cm light to medium weight iron on interfacing (this is optional but preferable)
- Seasalt x Start To Stitch jewellery pouch pattern (click to open)
- Optional: Printable PDF step-by-step guide (click to open)
Seam allowance
- All seam allowances are 1cm unless otherwise stated
Stitch length
- 2.5-3.5mm
Printing the pattern
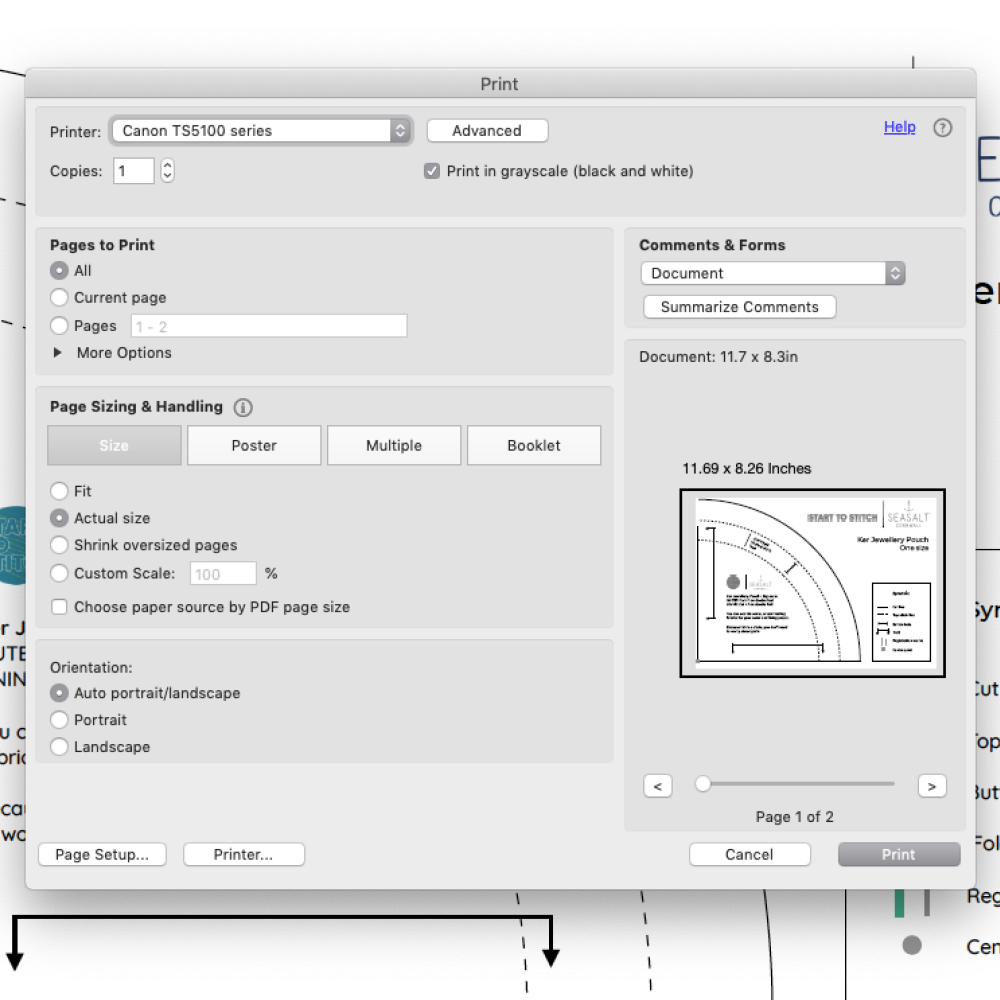
1. You can download your Seasalt and Start to Stitch pattern file here. After you have downloaded the file, you will need to print it. Make sure you set your printer to print at ‘actual size’ or ‘100%’ (not ‘fit to page’ or ‘scale’).
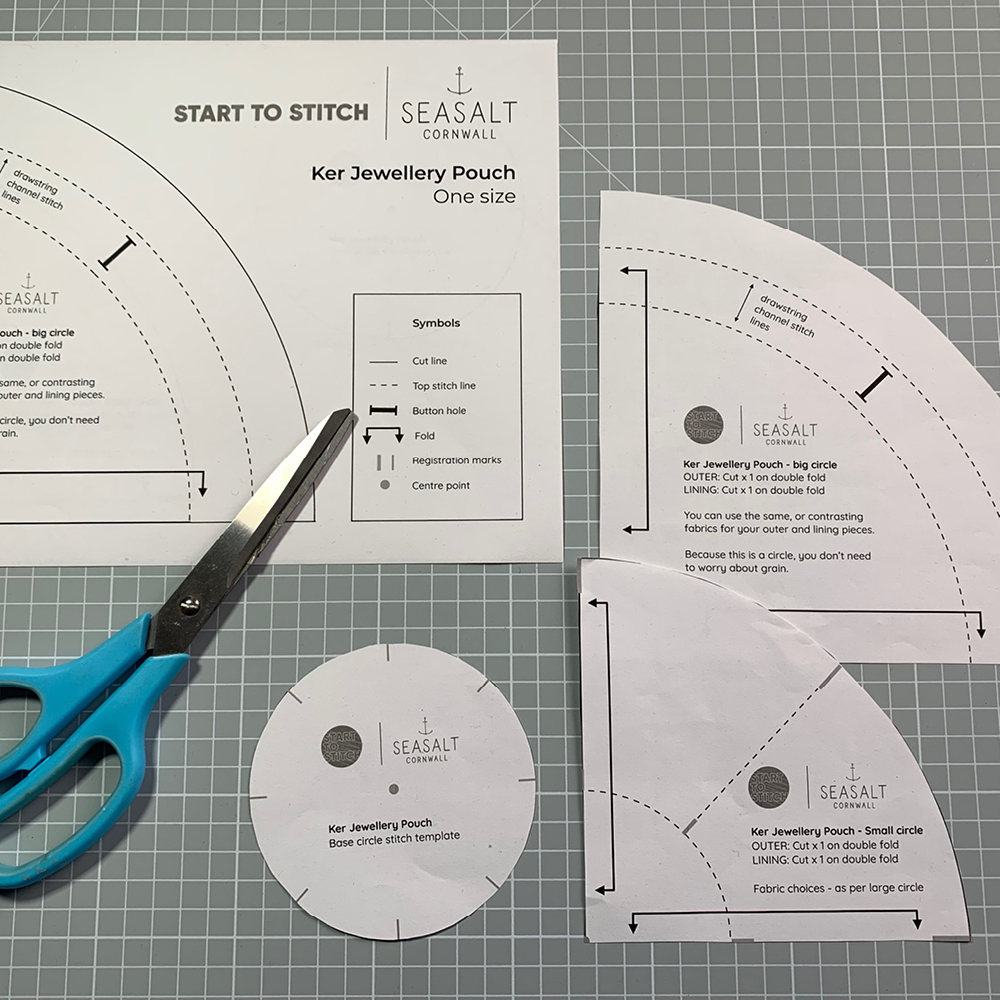
2. Cut out your pattern pieces ready to start sewing.
Cut and prep your fabric
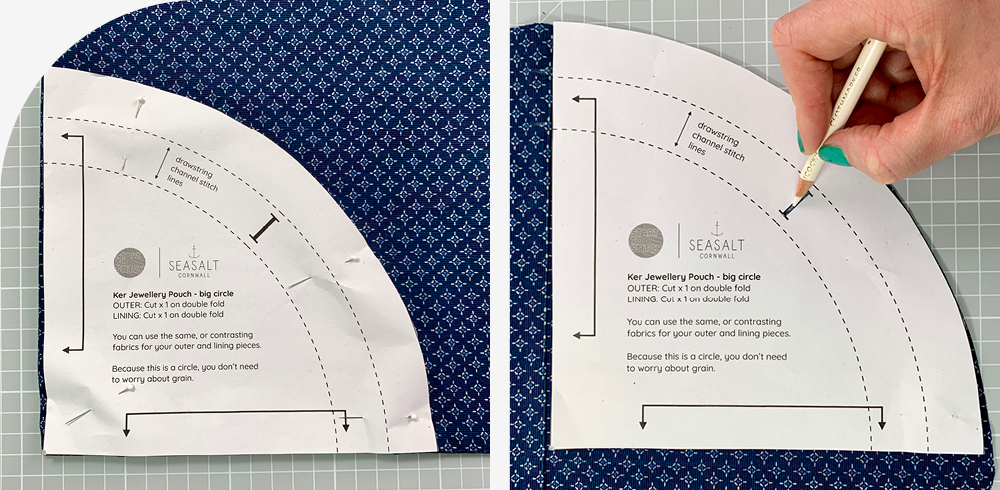
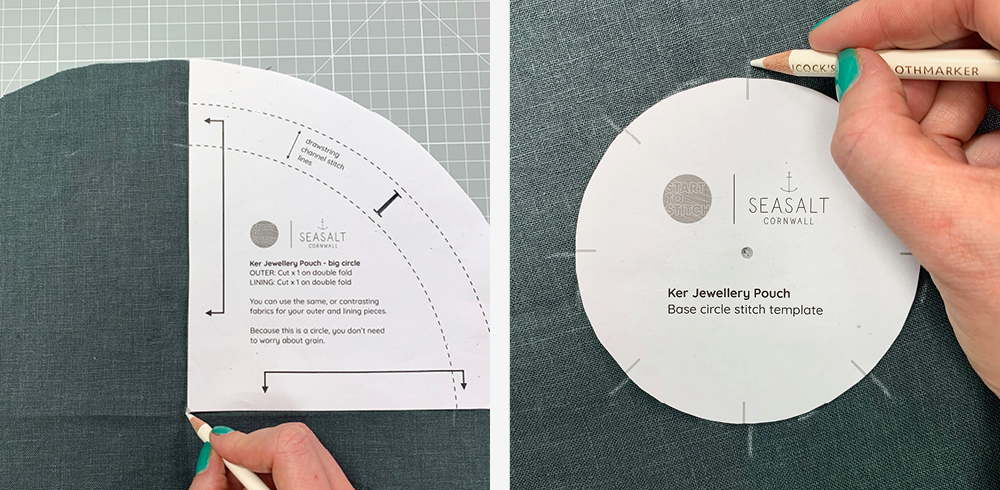
3. Fold your outer fabric in half, and then in half again. Place the pattern piece for the big circle on the quarter and pin / weight before cutting.
4. Open up your circle and transfer the button hole marking to two opposite sides of the circle using your preferred method, and on the right (the side that will show!) side of the fabric.

5. Repeat step 3 for the big circle lining fabric and the interfacing. You do not need buttonhole markings on either of these.
6. Fold your inner fabric in half, and then half again, and place the pattern piece for the smaller circle onto the fabric, lining up the edges. Pin / weight before cutting. Repeat for inner lining fabric.
Transferring markings
7. Using the pattern piece for the big circle, transfer the stitch lines onto the lining fabric. Use the corner to mark the centre point.
8. Using the pattern piece for the small circle, mark the centre point onto one of your small circle cut pieces. Then align the base circle stitch template and transfer the markings for the stitch lines.
Big circle assembly
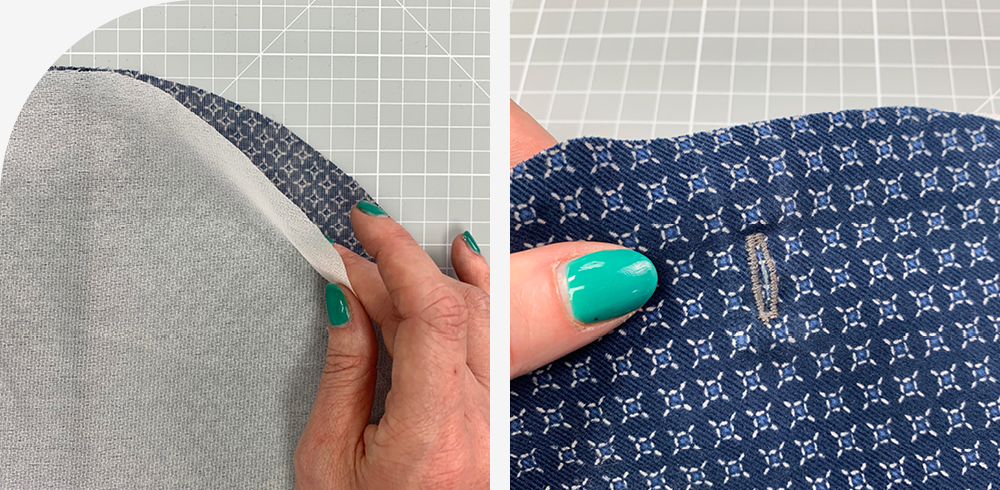
9. Take your big outer circle and place face down. Carefully align the interfacing, glue side down, on the wrong side of the fabric. Press.
10. Make a buttonhole in each of the two marked places.
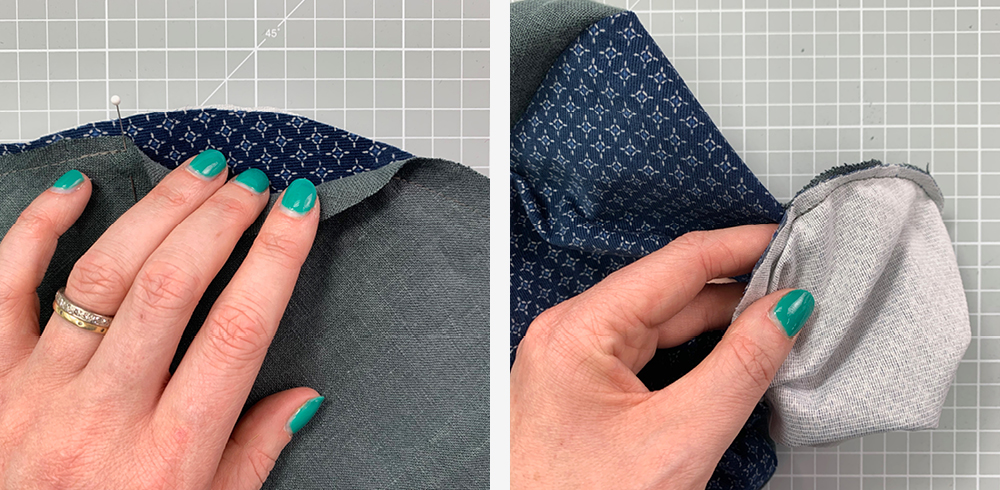
11. Place the two large circles right sides together, and stitch around the outside, 1cm from the edge. Don’t go all the way around, instead leave a small gap (about 5cm) so you can turn through.
12. Trim your seam allowance to just under 0.5cm and turn the circle through to the right side.
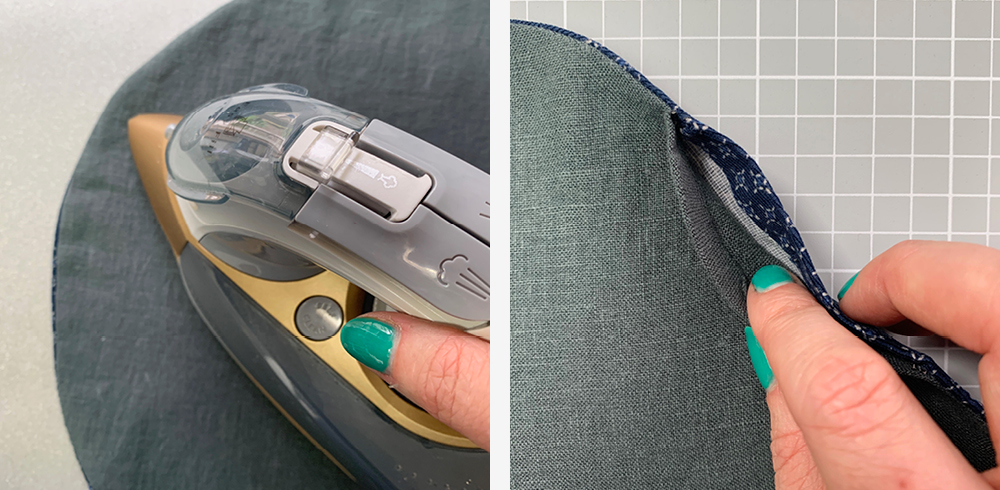
13. Use a ruler or the blunt end of your scissors to push the seam right out through the hole you have left. Press the edges.
14. Carefully fold the seam allowance of the gap back into the circle and then press.

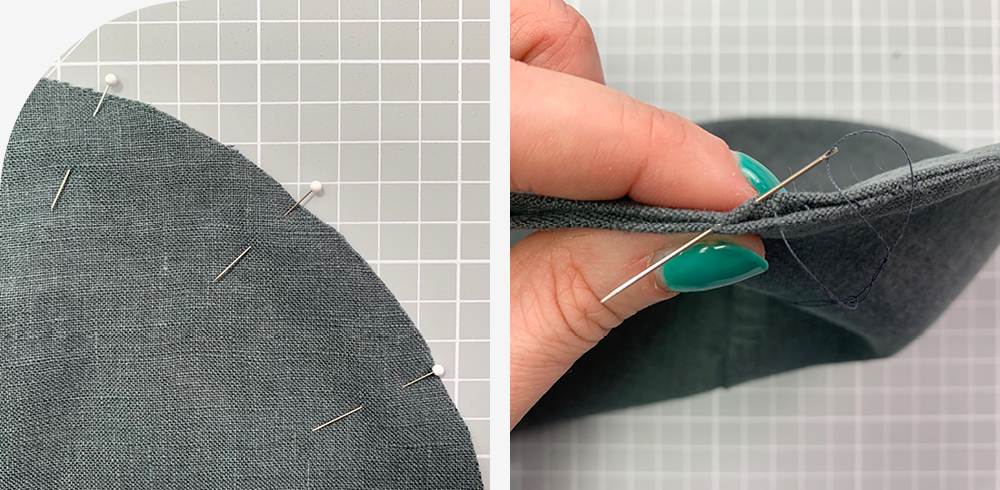
15. Edge stitch 2-3mm around the edge of whole big circle.
16. Following the markings you transferred in step 7, top stitch the channel into the big circle.
Small circle assembly
17. Place the small circle pieces right sides together and pin. Using a 1cm seam allowance, stitch around the edge leaving a 5cm gap as you did for the big circle.
18. Turn the circle through and use a ruler or the blunt end of your scissors to push the seam right out before pressing. Ladder-stitch or slip-stitch the gap shut by hand.

19. Place the assembled small circle markings side up onto the lining side of the big circle. Align them with a pin by pushing it through the centre mark of the small circle and place the sharp end onto the centre mark of the large circle.
20. Pin the two together with a pin in between each stitch line, and one in the centre .

21. Carefully top stitch the segments into place using your transferred markings. You may find that a shorter stitch, a slower speed, or both, will make the centre circle easier to sew.
22. Cut two 1m lengths of ribbon. Using a safety pin on one end of one length of ribbon, thread the ribbon through the channel, going the whole way around the circle and coming out at the same buttonhole through which you went in.
If you are using cord, knot or tape the end before you put the safety pin in to thread through. Cord can unravel very easily.
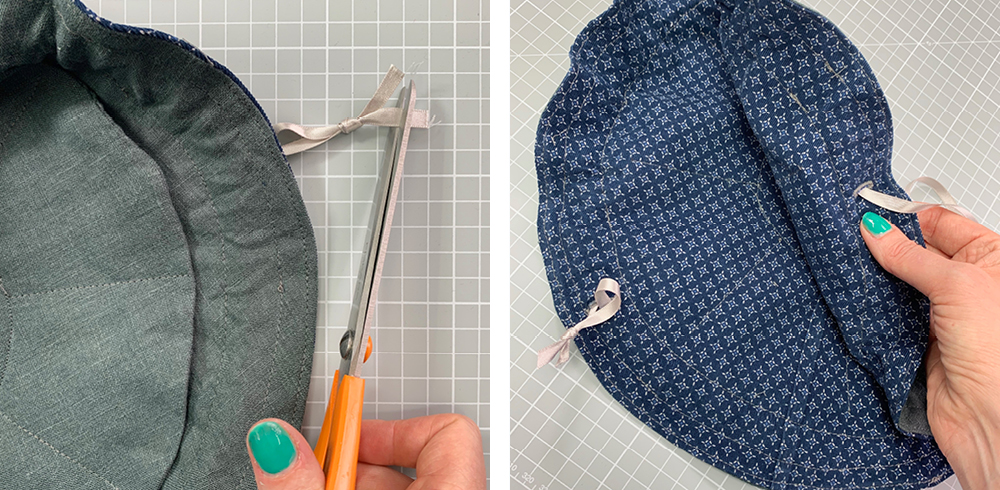
23. Knot and trim the ribbon ends and make sure the ribbon is evenly spaced around the circle.
24. Repeat steps 22 & 23 for the opposite buttonhole.

24. Gently pull the two ribbon ends to draw the circle in and close your pouch.
Congratulations! You have finished your Ker Pouch. Don’t forget to tag us #SeasaltArtsClub #KerPouch – we’d love to see what you make!
For more creative projects and upcycling inspiration, follow @seasaltcornwall and @starttostitch on Instagram. If you’ve enjoyed making this pouch, why not check out our other tutorials on Seasalt Stories.